Hop over to DIY Show Off and check it out along with all the other fun projects. I especially love Jessie's wood shim mirror!
Showing posts with label DIY. Show all posts
Tuesday, July 2, 2013
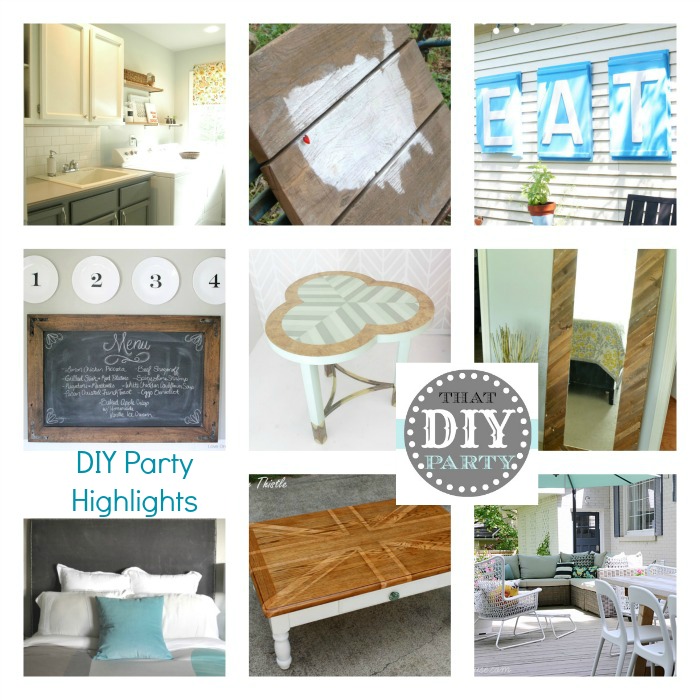
My Chevron Table Feature on {DIY Show Off}
Hop over to DIY Show Off and check it out along with all the other fun projects. I especially love Jessie's wood shim mirror!
Thursday, May 9, 2013
Chevron Painted Clover Table
Sorry for the lack of posts recently. School has started up again, so I'll probably be posting less for the next 11 weeks while I'm studying lighting and AutoCADing away. But I do have a couple more projects from the Noah's ARC nursery to share with you. So up next is my chevron painted clover table...
Ok... so its not exactly chevron, but I wanted to create a pattern that mimicked the chevron stenciled wall, so it sort-of is... and that's what I'm gonna call it! So there!
Although I really love every project we did for the Noah's ARC nursery, this little clover side table was basically my baby. I even bid on it myself, but I guess someone wanted it even more because they outbid me in the last 30 minutes of the silent auction. So new clover table owner, whoever you are, I really hope you're loving her as much as I do. :) Here's a little tale for you of how she came to be...
I took it to my home, gave it a good cleaning, taped off all the brass, and primed it. As you can see, I didn't do a very good just sanding (really it needed stripper) which bit me in the ass later. But until I knew that, I continued along my merry way and we spray painted it green and let it dry with all the rest of the painted furniture.
Then I went to tape off my design and as I was adjusting the tape, much to my dismay, the paint started peeling off!
I used the Sherwin Williams "Colonial Revival Sea Green" as the mid tone and mixed some white in for a lighter tone and added a darker paint (a sample of Benjamin More from Ace Hardware) for another dimension.
I also used caulking, which is a little painters trick I learned to make sure you get crisp lines. You simply run a light bead of caulking over your tape edge and then wipe it off with a damp cloth so its barely there. That seals your tape line down so paint doesn't seep underneath.
I taped off my design with frog tape using the tape width as a spacer and labeling "L," "M," and "D" to keep track of what color each line would be. Then I started painting...
Judging by the poor picture quality this was obviously a late night project. I spent a few evenings working on it, letting each coat dry for a day before painting the next. The left photo shows the first two coats (the medium base and dark coat) while the right shows all three coats before I took the border tape off.
To finish her off, I touched it up by hand and gave it a coat of wipe on poly/ Then, cleaned the brass legs with Brasso...
...stepped back and oooooed and awwwed...
Here she is in her final spot in the nursery...
And now she's in a new home for someone else to enjoy. Hope you're lovin' her out there!
Although I really love every project we did for the Noah's ARC nursery, this little clover side table was basically my baby. I even bid on it myself, but I guess someone wanted it even more because they outbid me in the last 30 minutes of the silent auction. So new clover table owner, whoever you are, I really hope you're loving her as much as I do. :) Here's a little tale for you of how she came to be...
I took it to my home, gave it a good cleaning, taped off all the brass, and primed it. As you can see, I didn't do a very good just sanding (really it needed stripper) which bit me in the ass later. But until I knew that, I continued along my merry way and we spray painted it green and let it dry with all the rest of the painted furniture.
Then I went to tape off my design and as I was adjusting the tape, much to my dismay, the paint started peeling off!
So I had to start over. This time I stripped the table with Citristrip first. When it was all stripped and sanded, we noticed this really pretty burled wood edge so we decided to tape it off keep the wood trim.
Then I mixed my paint colors...
I used the Sherwin Williams "Colonial Revival Sea Green" as the mid tone and mixed some white in for a lighter tone and added a darker paint (a sample of Benjamin More from Ace Hardware) for another dimension.
I also used caulking, which is a little painters trick I learned to make sure you get crisp lines. You simply run a light bead of caulking over your tape edge and then wipe it off with a damp cloth so its barely there. That seals your tape line down so paint doesn't seep underneath.
I taped off my design with frog tape using the tape width as a spacer and labeling "L," "M," and "D" to keep track of what color each line would be. Then I started painting...
To finish her off, I touched it up by hand and gave it a coat of wipe on poly/ Then, cleaned the brass legs with Brasso...
...stepped back and oooooed and awwwed...
And now she's in a new home for someone else to enjoy. Hope you're lovin' her out there!
Thursday, May 2, 2013
DIY Framed Jersey
If you were a 15 year old boy, or perhaps a 15 year old boy and a 16 year old boy who share a room (yep, you've got to imagine being two people at once!... haha) and you wanted your room to look "cool", what would you want? Some framed jerseys perhaps?
I've just recently begun working on designing my boyfriend's sons' room and YES, it has been confirmed that framed jerseys are on the list. Yay! Way to think like a teenage boy!
So we went on a hunt for some frames this weekend and found two of these bad boys on sale for $24 for both. You best believe we snatched them right up for this DIY framed jersey project.
Because the pictures were originally hung horizontally, we had to remove the hanging hardware with a screw driver. Next I pulled off the tape on the back and...
began removing staples like a boss!
After pulling the mat apart from the print, I used the original print on cardboard to create a form for the jersey. I cut a notch for the neck and also trimmed the top so that the shoulders would be at an angle conforming to the fit of the jerseys. That's the way uh-huh uh-huh I liiiike it! ...uh... don't ask.
I used the same piece of cardboard that held the art in as the backing to mount the jersey. To make it look clean and professional, I bought a yard and a half white felt from Joann's for $8. Since you could kind of see through the felt, I spray painted the cardboard white. With the cardboard painted, I pinned the felt to it so it was correctly aligned. Then unpinned and lifted one half at a time, sprayed it with adhesive, and smoothed the felt down.
Teen boy wanted the name on the back showing, so I turned the jersey over, laid it on the felted cardboard, and pinned it in place.
Finally, we put it back into the frame, and reinserted the staples. Ta da!
Tuesday, April 30, 2013
Two DIY Lamp Redos
Baby's gotta have a little light in their room right? We reinvented two lamps for our Noah's ARC nursery. I don't have many pictures of the process, but I thought I'd share the before and afters anyway.
First up is this little table lamp. Coincidentally, the pattern of the metal shade happened to be the same as one of the fabrics used for the suitcases.
Second, we have this floor lamp with its interesting base. We thought the lines were whimsical and fun, and knew we could transform it with a little paint and a new shade.
We gave it a coat of primer...
Because of its location in the space, I couldn't get a good picture of it in situ. In the photo below you can see why. It was impossible to get a full-length photo of it without showing you all of the lovely Salvation Army store.
We put it in the corner by the toy chest to create a sense of height on that side of the space and to carry the green color over to the other side of the room.
Lighting really dresses up a space and I think these lamps add the perfect finishing touch of whimsy.
First up is this little table lamp. Coincidentally, the pattern of the metal shade happened to be the same as one of the fabrics used for the suitcases.
It basically has two shades: a metal cut-out one that matches the finish of the base, and a white fabric shade inside that. So in order to refinish and recover it, we had to disassemble. I'd say this was a simple effort of man and screwdriver, I mean... there were only three screws holding the shades one, but MAN were they in there like a teenager on Facebook! Pavitra got one out, but had to have someone at Home Depot help with the other two. I'm not sure how they got them off, but they did!
Then all it needed was a few coats of white spray paint and some new fabric over the shade. Guess which fabric we used... Yep! the green one that was the same pattern. It's always effective to echo patterns throughout a design. This is a simple way to make things look cohesive. Here's the final product...
We gave it a coat of primer...
... and a coat of "Colonial Revival Sea Green." Then Pavitra followed this tutorial to create the burlap lampshade over an inexpensive plastic shade from Ikea (I bought it before Christmas for about $5).
We put it in the corner by the toy chest to create a sense of height on that side of the space and to carry the green color over to the other side of the room.
Lighting really dresses up a space and I think these lamps add the perfect finishing touch of whimsy.
Thursday, April 25, 2013
DIY Baby Bedding
Are you having trouble finding the perfect baby bedding for your nursery? Why not make some? By recovering a crib bumper, pillows, and a standard changing pad (all found at the Salvation Army) with some inexpensive fabric from Joann's, we created a custom look that's bright and cheery. Kathrine was our seamstress extrodinare for the project, so lets give a big thanks to her for all her hard work!

Not only do they work with our contemporary coral and mint color palette, they also bring in some brighter greens and a little yellow. This works because the colors are in the same family and we spread them throughout the room to create a sense of balance and unity. You'll see the more intense greens in the fabric covered suitcases, the storage bins in the armoire, and on the table lamp (which I have yet to tell you about); while the more muted green is used for the back of the armoire, the side table, frames, and the floor lamp.
Anyway... moving right along... we found various size pillows at the warehouse.
As well as a changing pad and crib bumper (which you can see in the box below). Duchess thought I brought home a bed for her, but to her disappointment, the pad (along with the bumper and pillows) was sent to Kathrine's for a new cover.
First Kathrine measured out pillow sizes...
Then she sewed some simple squares with the machine (good sides facing each other), popped the pillow inside, and sewed them shut by hand.
She also took the existing bumper and simply covered it with our chosen fabric. For the ties, she simply cut small holes for the original ties to fit though.
As you can see, she ran out of fabric at the end, but picked up some more and matched up the pattern to finish it off. She also used this happy fabric to create a new changing pad cover.
My kitty wasn't the only furry creature excited about these projects! But anyhow... she also made a fitted sheet for the mattress, which I don't have photos of, but there is a simple tutorials here.
Rachel also repainted the crib, which was the most time-consuming painting project of all. But all that hard work paid off.
The cirb with all its fresh white and new bedding looks amazing!
All of this bedding, the changing pad cover, and pillows are still on silent auction at the Huntington Beach Salvation Army. So stop by and name your price! And here's a few more shots of the goods in situ. Enjoy!
Wednesday, April 24, 2013
Glider & Ottoman Redo
Happy hump day ya'll! Hope you're having a good week. Today I bring to you another before and after from the Noah's ARC Design Challenge Nursery designed by my team from Interior Designers Institute. This glider and ottoman redo was the combined effort of all our team members. Thanks ladies! Here goes...
If you've been following along, you may remember this rocker found at the Salvation Army's Anahiem warehouse...
We chose it because of it's modern style and more delicate lines than the other rockers we saw. But black wasn't in our color scheme so we were ready with Sherwin Williams "Westhighland White" and a spray gun to give her the old switch-a-roo.
Then I aligned the fabric so that the pattern was centered on the ottoman...
...and stapled away just like I did on my ever so popular LACK ottomans.
To create a new cushion I used the remainder of the foam camping pad from Home Depot that I had used for the LACK ottomans. This stuff is less expensive than upholstery foam and nice and firm so it wont sag. I created a template with paper to fit on the glider...
Then used a kitchen knife to cut the foam to size. With the cushion on the seat, I traced the rounded corners and cut those too.
Then Katherine busted out the sewing machine and created a cover for the cushion making sure to center the pattern so it would align with the ottoman. Some final sewing by hand finished the job. Isn't she a beaut! Unfortunately I don't have any photos of that part, but it came out awesome right!?
More on the pillows and crib bedding tomorrow. And the side table transformation is coming up too!
Subscribe to:
Posts (Atom)


