Showing posts with label Before and After. Show all posts

Thursday, July 11, 2013

Mini Patio Makover

Hi ya'll! Today I'm going to share with you the mini makeover I gave my "patio" last weekend.  Its really just the landing at the top of my stairs, but since I don't actually have a patio or porch or anything of the sort, this tiny space is my apartment version of a patio.


You'd think I would have done it before the 4th right? But no, I'm a procrastinator and did it after. I did do a bunch of thinking about it before though! That counts for something right?!  Haha. Jk.

But for realz... if you follow me on Instagram or Facebook, you might have guessed that I've been looking for a job which has been a lot of work.


Yup, that's me! All ready for an interview. I'll tell you guys more about all that soon.  But for now, lets get back to the patio makeover...

Who kills every flower they put on their patio? That would be me.  I'm great at keeping my indoor plants alive, but I tend to neglect the patio plants and they just don't do well without a lot of water.  So here is what my patio looked like before the make over...


So sad!  Aside from dead plants, I also wanted to give that thrift store chair a fresh fabric and my welcome mat needed a good shake since my kitty sheds all over it. (I'm blaming that one on her! Haha)  And just ignore the broken screen... that's my ghetto-chic kitty door!  The overhang is also a big disaster. One day the management started scraping the over hang, presumingly to paint it, only to reveal major termite damage, at which point they stopped and left it that way. That was months ago. And lets just not talk about the giant crack in the landing.  Thanks management guys!  But that stuff is not my responsibility, so lets get down to the stuff that is...

The first step was to plant some new plants. I had a snake plant indoors that I wanted to move to that pot and thought it would be perfect to surround it with some fun, hopefully easy to keep alive, succulents.  I stopped by The Plant Stand in Costa Mesa, which has a really nice selection and learned that they were having a succulent "class" the following day at which they were giving out 50% off coupons for succulents. Count me in!


I went back the next day to collect the goods and my awesome boyfriend offered to keep me company. I thought he'd be helpful in the decision making process because he usually just picks one thing or the other, but instead he got super into the succulent hunt!  He kept finding new succulents he liked.  It was so cute!  Now maybe he knows why I always have a hard time making decision like that.  They're all so great!  But we finally did come to a decision and picked out a nice variety of scale and colors.  And the result...


Next, I recovered the chair with a fabric remnant that I got from school.  I actually kind of like the existing equestrian print fabric, but I thought something a little more modern and colorful would give it a little excitement. I went to Joann's to find something but discovered that they are closing the location by my house and only selling fabric by the entire bolt. Not wanting to purchase 6 yards of fabric for which I have no use, I decided to stick with the remnant.


There I am screwing the seat back on... so exciting!  Even though it wasn't my first choice of fabric, when it was all said and done, I think it turned out great!  And especially appropriate for the Fourth of July (even though I finished it on the 6th). I thought about repainting the metal, but I decided to leave that to another day.  Check out the before and after...


And the whole 4 square feet of my "patio" all pulled together...


Much better right?  Now all I have to do is keep my little succulents alive.  Wish me luck!


Monday, June 24, 2013

Mom's TV Room

Today's the day, guys (or mostly gals actually)! As promised (here and here) I'm finally going to show you mom's TV room that I designed.   The goal was to create a comfortable, organized, and, of course, pretty space on a budget for mom to watch TV, go through mail, fold laundry, play with kitties, and generally hang out. A lot of living happens in here! So I wanted to give her a place she could really enjoy. And the project was a success!


Two of my most popular posts were a result of this project: the Lack Side Tables Turned Ottomans and Organizing Mom's Den.  But that's not all that went into this space.  Here it is before the transformation...


This is actually part way through the organization process because I'm super bad about taking before photos. I just get so excited I start doing stuff before snapping a pic!  And there's my beautiful mother. She's the best!  Anyway... as you can see, the old sofa was way to big for the room, paint color was off, and some serious organization was needed.  Tomorrow I'll tell you more about what went into designing this space. But for now... pictures!


TDC Before and After


Monday, June 17, 2013

Dad Decor {Quick Bedroom Makeover}

Hope everyone logged in some good dad time yesterday on Fathers Day. Or at least got to have a nice chat with the father figure. I'm so blessed to have an awesome dad who's armed with an arsenal of nick names, ran 7 miles of my first marathon with me (after completing TONS of his own), sings his own lyrics to rap songs, helped me purchase my first car, and continues to be amazingly supportive of my life goals with just the right amount of goofy (which in my opinion is VERY).  I got to spend a nice weekend with him and my mom relaxing, eating, and doing a little design work!  I helped give his bedroom a quick little makeover.


We've still got a few more changes to make (like curtains and a night stand) for the room to be complete, but I thought I'd show you the quick transformation.  Here it is before...


We simply got this Ikea rug (off craigslist) and these Ikea wall lamps and did some minor rearranging.  I also got him yellow pillow cases from West Elm that have since been discontinued.  I love how the pillows and yellow rug bring out the yellow in his painting.


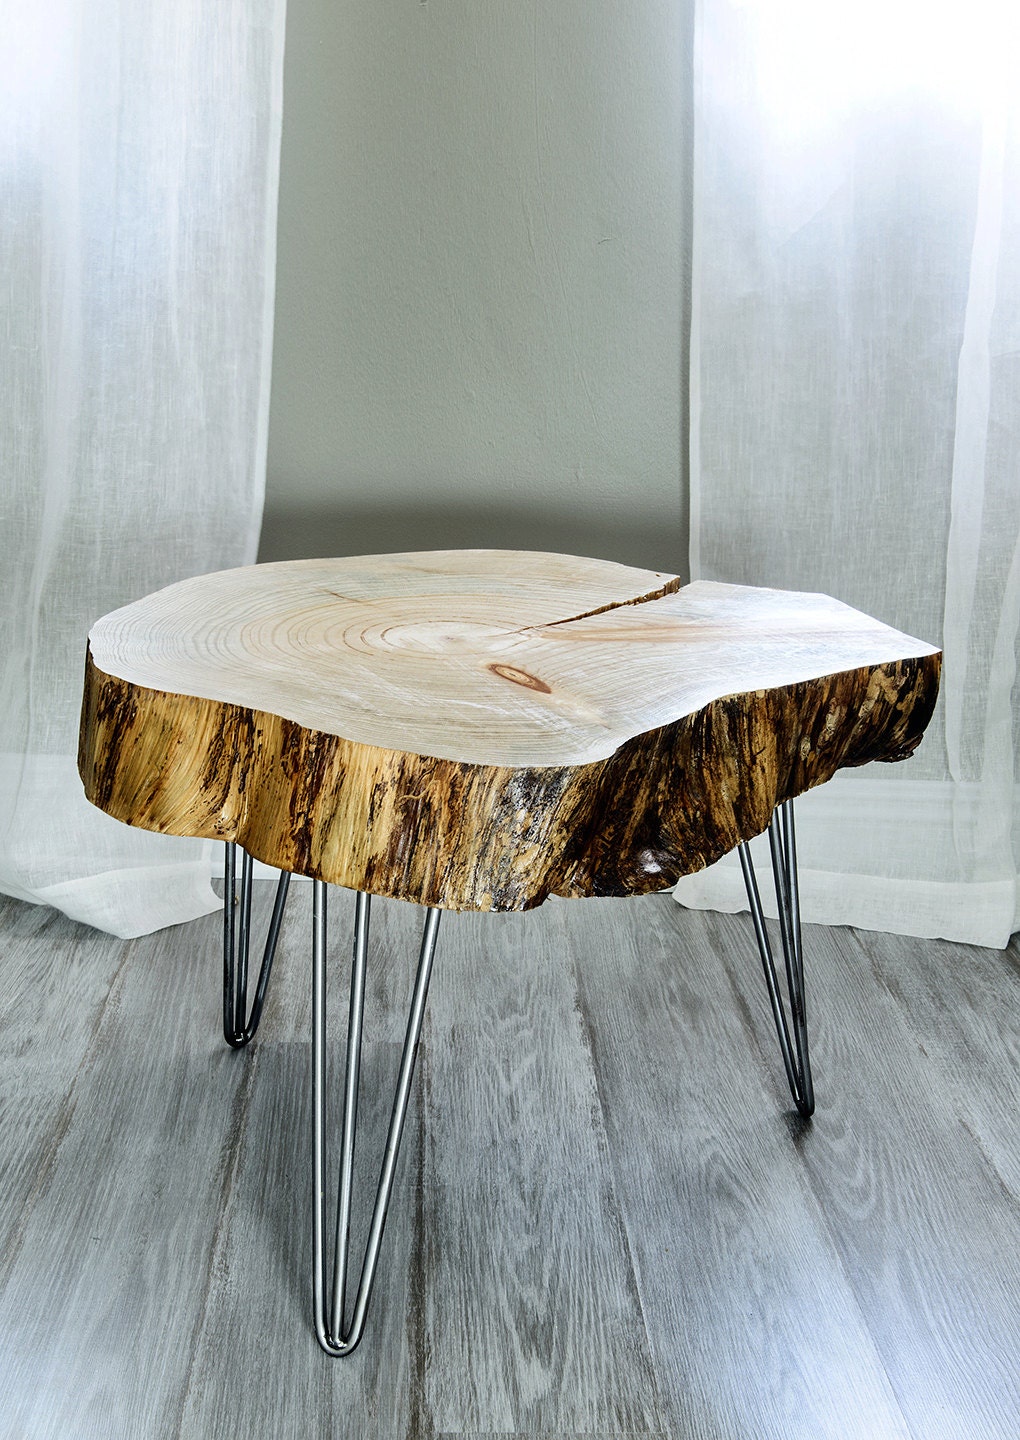
Chester obviously likes it! Although I think he was always happy with his spot on the bed.  We plan on getting some white drapes and probably changing out the drapery hardware.  And I'd love to find or DIY a wood slice table like the one below to use as a nightstand instead of the chair.

Source: Etsy

But for now, Dad's happy with the improvement.


Wednesday, April 24, 2013

Glider & Ottoman Redo

Happy hump day ya'll!  Hope you're having a good week.  Today I bring to you another before and after from the Noah's ARC Design Challenge Nursery designed by my team from Interior Designers Institute.  This glider and ottoman redo was the combined effort of all our team members.  Thanks ladies!  Here goes...


If you've been following along, you may remember this rocker found at the Salvation Army's Anahiem warehouse...


We chose it because of it's modern style and more delicate lines than the other rockers we saw. But black wasn't in our color scheme so we were ready with Sherwin Williams "Westhighland White" and a spray gun to give her the old switch-a-roo.


 It took quite a few coats and of course a base coat of primer to cover up the black, but we got her there.


Then, Katherine and Pavitra made a trip to Joann's to pick out this lovely fabric.  The large scale grey print was the one they picked out for the rocker.  So once they got it too me, I spent an evening pulling staples out of the ottoman to remove the cushion.  Bye bye old warn fabric!


 Then I aligned the fabric so that the pattern was centered on the ottoman...


...and stapled away just like I did on my ever so popular LACK ottomans.


To create a new cushion I used the remainder of the foam camping pad from Home Depot that I had used for the LACK ottomans.  This stuff is less expensive than upholstery foam and nice and firm so it wont sag.  I created a template with paper to fit on the glider...


Then used a kitchen knife to cut the foam to size.  With the cushion on the seat, I traced the rounded corners and cut those too.


Then Katherine busted out the sewing machine and created a cover for the cushion making sure to center the pattern so it would align with the ottoman. Some final sewing by hand finished the job.  Isn't she a beaut!  Unfortunately I don't have any photos of that part, but it came out awesome right!?


More on the pillows and crib bedding tomorrow. And the side table transformation is coming up too!

TDC Before and After

Tuesday, April 23, 2013

A Nursery Armoire Before & After

Hello fellow readers and bloggers! Sorry for the hiatus.  After the completion of the Noah's ARC Design Challenge, which I first told you about here, I took a little break from blogging.  I had a super relaxing weekend and hope you did too!

But now its time to get on top of the remaining projects from Noah's ARC (not literally of course).  Today I'm going to share with you the deets on this beautiful before and after...


We started with this armoire we found at the warehouse...


It has some really beautiful details...


These lovely feminine curves are what dictated most of our other furniture choices.  (More on that here.)  But it also had quite a few large dings in it...


To cover up these blemishes and create a real fresh and clean look, we decided to go white.  (More about our painting plan here.)  So I patched up these nicks and dings with some wood filler, sanded them down, and then handed it off to Rachel took to it with the air compressor and spray gun full of Sherwin Williams "Westhighland White."

With it all painted white inside and out, it looked sparkly and new! But we wanted to give it a little something extra.  So I taped off the bottom insdie and painted the back by hand with SW "Colonial Revival Sea Green."  (Sorry for the poor picture quality; I was painting in the poorly-lit garage at night.)  


We also had two pieces of wood cut to create shelves. Initially we thought we'd have to create braces to hold them up, but as we began painting we noticed that it already had holes for dowels to hold up shelves.  The great thing about this is that whoever its new owner may be can adjust the shelves to their liking!  With  the shelves painted white, we popped them in.

To hang clothes, we cut down an old rake found at the warehouse and attached it with brackets from Home Depot.


Lastly, we taped off the lower inside door panels and painted them with chalkboard paint.  I love this last little touch!  Adorable and functional for your little child's budding creativity!


With the project complete, I styled the shelves with baby clothes, shoes, childrens' books and some storage bins beautified by Pavitra with decorative paper...


PS.  All final photos are taken with my new Canon Rebel t3i. Yay! :)

TDC Before and After