Friday, November 1, 2013

Design Sketches

Hope everyone had a happy and fun Halloween!  I spent mine in class in my yellow crayon costume. Fun times! Anyway... I had to present my process boards for my Residential Project and thought I'd share with you guys some of the sketches I've done for my project.

Sketching is an amazing tool to be able to communicate your design ideas to a client.  I also find it really helpful in the design process to get a better idea of what a space plan will look like in 3-D... especially when I want some interesting architectural details goin' on like I do in this project.  If you follow me on Instagram or Facebook, you've probably already seen these, but I thought I'd share in blogland as well.  Hope you enjoy!

Foyer

Formal Living Room

Master Bedroom


Master Bathroom

And if you haven't already, check out the inspiration photos in my last post or on Pinterest board.

Tuesday, October 22, 2013

Residential Design Project Inspiration

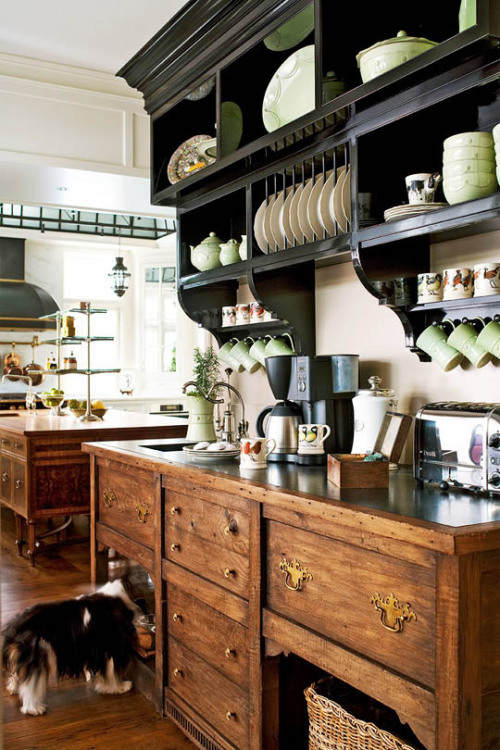
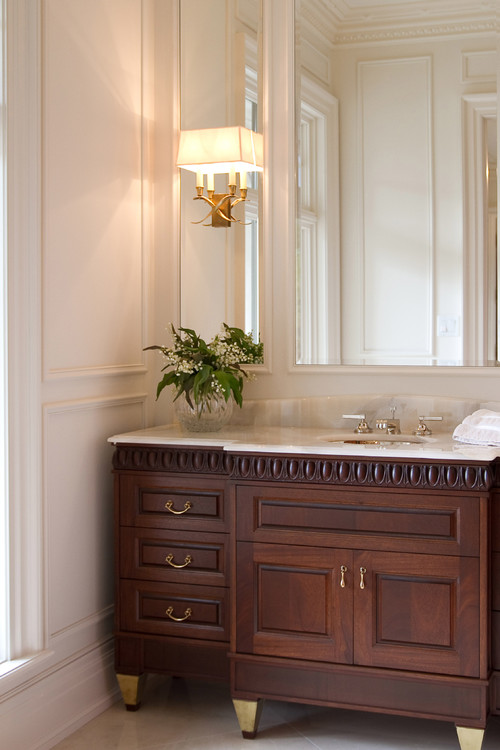
So I've been pinning away and getting inspired for my residential project for school.  I'm going for a traditional look that incorporates articulated architectural detailing, classic finishes

We're supposed to have one inspiration photo for our process board which will be due in the next couple weeks. I'm not sure how I'll narrow it down, but I though I'd share with you guys my inspiration.  And feel free to check out more on my Pinterest board.

Enjoy!


source


Monday, October 14, 2013

Taking the Plunge: Putting Together Portfolio

I told you I'd get back to the "Taking the Plunge" series I started, so here I am!  Today I'll tell you/show you how I put together what I call my "Draft" Portfolio.  If you're looking for a job in the interior design industry, a portfolio is something you will absolutely need. But what do you do if you haven't finished school and don't have any "real" projects to include?  At my school we have a class as part of the Bachelor's program where they teach how to put a portfolio together and help you refine yours. But that class is at the end of the program, so what about us folks who aren't that far along in school and want design jobs? What do we do?  Here's what I did...

As always, Google is your friend. I did some internet research on "interior design portfolio" and also thumbed through a book on the same subject in my school's library.  From what I could tell, it looked as though students basically "deconstructed" their digital design board and reformatted each project to a more manageable size, like 11"x17" (or a spread of 2 11"x17" sheets), to be added to a portfolio book. Another common thing I noticed was a consistent graphic design across all pages to pull the projects into a cohesive book... basically like a letterhead with some type of header/footer.

So I followed their lead and deconstructed my own digital design boards and reassembled them in 11x17 format. I made sure to include sketches, floor plans, fabirc and major furnishing choices to give the overall idea of each project.  While I did this for all of my digital boards, I didn't have the time to do this for my first board which wasn't digital since it would have required finding all the images angain.  Instead, I just included photographs of the boards.  I also made a point of including some sketches, CAD drawings, etc. to show a variety of skills as well as the process of my designs. I did also  utilize the idea of a consistent header/footer graphic and created a simple stripe at the bottom and top of each page along with the double arrow (from the blog) next to each heading.

I created the whole thing in Adobe InDesign had it printed on 11x17 paper. I used brads to hold it together so that I could switch around the order or add/remove pages depending on which employer I was showing it to.

It still could use a lot of editing and refining, and will eventually have quite a few more projects in it... heck, I may even change it all together when I'm in the Senior Show class! But for now, it works.


Thursday, September 26, 2013

Back to the Grind... the good Grind

I'm happy to say that I'm back to school since the week before last.  I really love it!  I'll get back to "Taking the Plunge" next time with a little info on how I put together my portfolio, but for now, I thought I'd give you a little update of whats up design-wise in my life right now since I've gotten a bit behind.

This quarter I'm taking Residential Design and Business Principles.  So I'll be designing a New York apartment for charismatic music mogul and business owner Harry Sanborne (Jack Nicolson's character from Something's Gotta Give), his food critic wife Karen (from the play Dinner with Friends), and Taylor Swift.  Just turned in my client profiles, design concept and design program last week and am looking forward to designing a comfortable traditional home to add something a bit different to my portfolio.

In the mean time, at Dwellings Design Group, we've been working on a modern remodel overlooking the back bay.


A bathroom and kitchen remodel, as well as redecorating a home with a pottery barn look.


And some other little jobs here and there. So I've got quite the variety of design in my life right now. And I love it!


Friday, September 6, 2013

Taking the Plunge: Revamping the Resume for Interior Design

Sorry I've been off the map for a little while.  I hope everyone had a fun Labor Day weekend. I know I did!  I have since been working out of a hotel room while my apartment is fumigated for termites. Fun fun! Anyway... lets get onto round two of "Taking the Plunge."  

If you're interested in taking the plunge into another career, one of the first things you probably need to update your resume.  Today I'll share with you how I updated my resume to transition from Civil Engineering to Interior Design.  Of course you'll have different experience and objectives, but I figured it might help someone out there to break down what I went into my design resume and what I changed.

revamping your resume, redoing your resume, stylish resume, design resume

  • I'll tell you more about my branding in another post, but I basically wanted to create an image for myself and make my resume look good.  I used the same text and arrows that I used for my blog.
  • I added an objective that I tailored for the various jobs I was investigating.  In this one, I specifically noted that I want to work at a "high-end residential firm."  For another resume geared toward retail, I emphasized customer service.  This is a simple change to make that can really make your resume and you fit for the position you're looking for. You can even use words from the job description!
  • I put my education and design skills at the top. Because I didn't have any design job experience, my design education is the most relevant information for the positions I'm interested in.  I also chose to give descriptions of my school design projects.  If you have relevant design experience you could choose to make two different job sections for "Relevant Experience" and "Other Experience" or something along those lines.  Basically, the idea is to get the stuff that relates to the job you're looking for at the top.
  • One mistake I did make was not putting my expected graduation date. I left it off because I wasn't sure if I was going to continue onto the bachelor program or stop at after I get my associates degree.  But most people asked me when I was going to be finished with school, so I just gave them an answer based on finishing the bachelors anyway.  So I should have just put that on there and recommend for your to do so even if you're unsure. Just pick the date you think is most likely.
  • Throughout my resume I made the important information, like desirable computer skills and awards, stand out with bold text.  That way at a glance someone should be able to see the stuff that is important to the job and the stuff that makes you stand out as a candidate.
  • Add any memberships you have with professional organizations in your industry. It looks good to be involved.
  • In the last section of my experience I modified my job descriptions quite a bit to make them more general. Interior designers don't typically know what H2OMap or InfoSWMM are, so instead of listing specific computer programs I used in my engineering job, I more generally wrote "hydraulic models." I also added key words like "problem solving skills" to express the transferable skills that I have gained from my experience. 
  • Finally, I added a little pizazz to my resume by adding a border and making some text the same color. As far as I know, this isn't something that's done for an Engineering job and probably many others. But since design is largely about aesthetics, you better have a good lookin' resume if you want it to be your profession.
Hope that helps someone out there!


Monday, August 19, 2013

Taking the Design Plunge: 5 Tips for Interior Design School

Recently, a reader emailed me asking how I went about "taking the plunge" into an interior design career from a career that is so different: Civil Engineering. I've been meaning to write about this for a little while now, so I was happy to be reminded. This "Taking the Plunge" series of posts will share details of how I worked my way into the field of design. I still have quite a ways to go, but I figure, why not share it with ya'll while it's current and fresh on my mind. Hopefully this can be a helpful to anyone else looking to change careers to pursue a passion. It is by no means the only way to go about transitioning; this is simply my experience.

As most of you probably know (if you've read the About Me section), I started out by searching out and enrolling in interior design school.  I felt that for me to be confident in my future career, I needed the education to back it up.  I looked at a few different schools that were CIDA accredited--that's the Council for Interior Design Accreditation.  I wanted to go somewhere that had a reputable program.  Finally, I decided on Interior Designers Institute because it was accredited, close to my house, and slightly less expensive than others I looked into.

I went into school excited and interested.  I've been quite successful in it thus far, so I thought I'd share with you a few ideas that I developed from the beginning, which I believe have helped me.

  1. Don't worry about grades. I'm not in school to get a good report card like I was in elementary school.  I enrolled in design school to learn information and how to apply it and to exercise and hone my design skills.  The learning is the important part to me, not the paper transcript. So I don't think about my grades.  And what'dya know... the grades that have followed as a result of that attitude couldn't be better.
  2. Treat each teacher as your client.  We usually have to make up a fictional clients for school projects, but I always think of my teacher as the client since they are evaluating the work.  If they have input, I take it; if they don't like something, I change it.  I do my best not to take things personally and figure it's good practice for dealing with clients in the future.  I also keep in mind that there are so many different ways to design something well, so I need to be flexible and not get stuck on doing something one way.
  3. Learn from your peers.  I always look around at other student's work.  There are many talented people at school, so I try gather as much inspiration as possible.  I love seeing the way that different people approach projects and their unique visions.  It helps me expand my ideas about design and look at projects in different ways, which might help me to think of better design solutions.
  4. Be the best you can be; don't try to be THE best.  Some people might disagree with me here, but for me, trying to have a little humility goes a long way.  I must admit, I'm human and pride does get me at times, but I do my best to stifle it.  Design is such a subjective matter; there really is no "best."  I try not to think of school as a competition and instead remind myself of #3... instead of being stuck on trying to be the most awesome, I remind myself that others have awesome ideas as well.   I appreciate the work of my peers, let myself be inspired by them, and do the best that I can on each individual project with the "client" in mind.  
  5. Be of service.  I think helping my peers feeds the soul. Like I said... it's not a competition. I don't hesitate to share ideas, information and assistance whenever possible.
Armed with these objectives, I think you're bound to maximize your success. Now, go get 'em design students!

Coming up in the series, I'll share about...
  • how to revamp your resume for design,
  • putting together a portfolio (quickly), and
  • searching and interviewing for jobs.